Why use Figma?
If you’re the first or only designer in an organisation, the task of setting up files and systems will fall to you. While it may seem daunting and difficult, there is a simple way to set up files and share information in Figma.
Figma is a really great software for designers, especially if you are working on complex products or need to involve people outside of your team in the process.
Having all files and information in one place is very important, for many reasons, here are some of them:
- It’s easier to keep track of everything in one place.
- There is no need to learn multiple tools, or educate others.
- It’s great for new starters – it becomes their learning hub where they can find out everything about products and projects.
- It makes it easier to collaborate with people on other teams, and that creates better solutions.
- It saves time, because you don’t need to import, export, or configure different platforms.
In this article we will have a look at how Figma files can be set up to accommodate that collaboration in particular.
Teams and projects
First thing you need to understand about Figma structure is the concept of teams and projects.
A team can be a design team, or it can be a department or an entire organisation. But every team can have multiple “projects”.
Projects, in turn, can have unlimited files, and every file can have unlimited “pages”, or sections.
Multiple teams are probably very useful, but you will need to pay more for those licenses. However, you don’t need multiple teams to achieve the same result. In the example shown, a “team” represents an entire organisation, and then projects are used to separate work.
While you’re on the “team” section, you can see al the projects that team has. They show up as horizontal tiles.
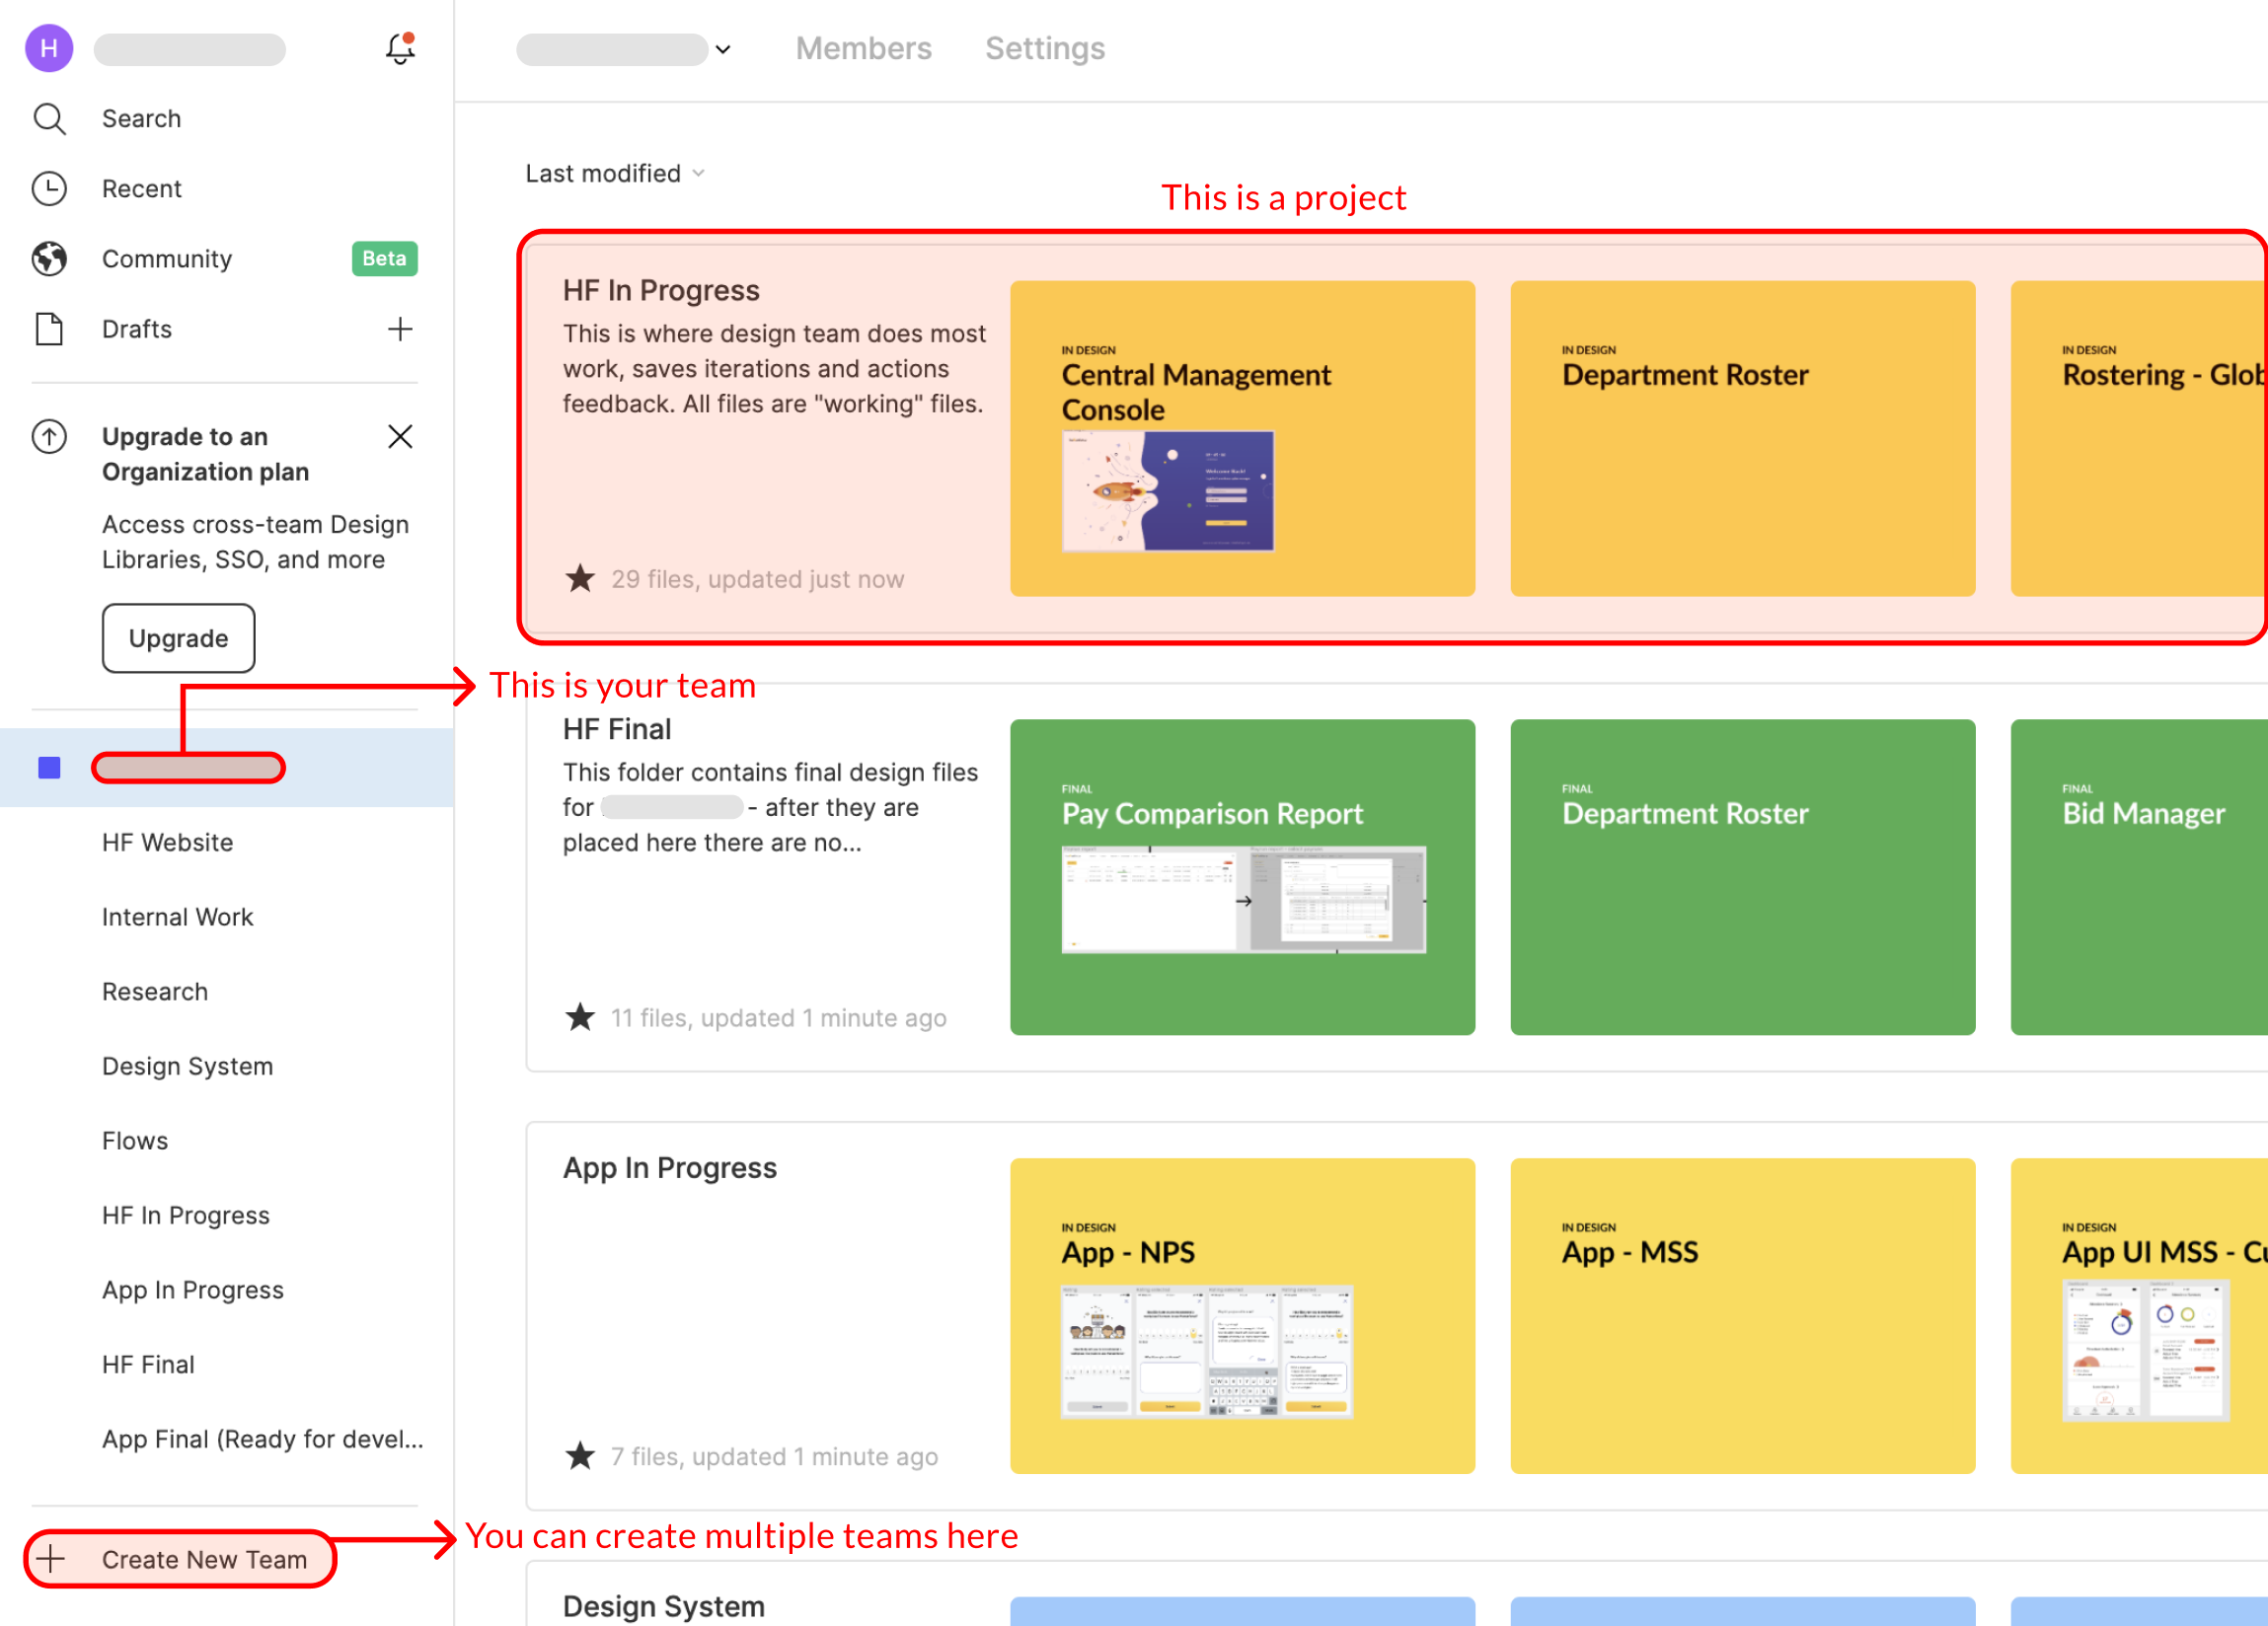
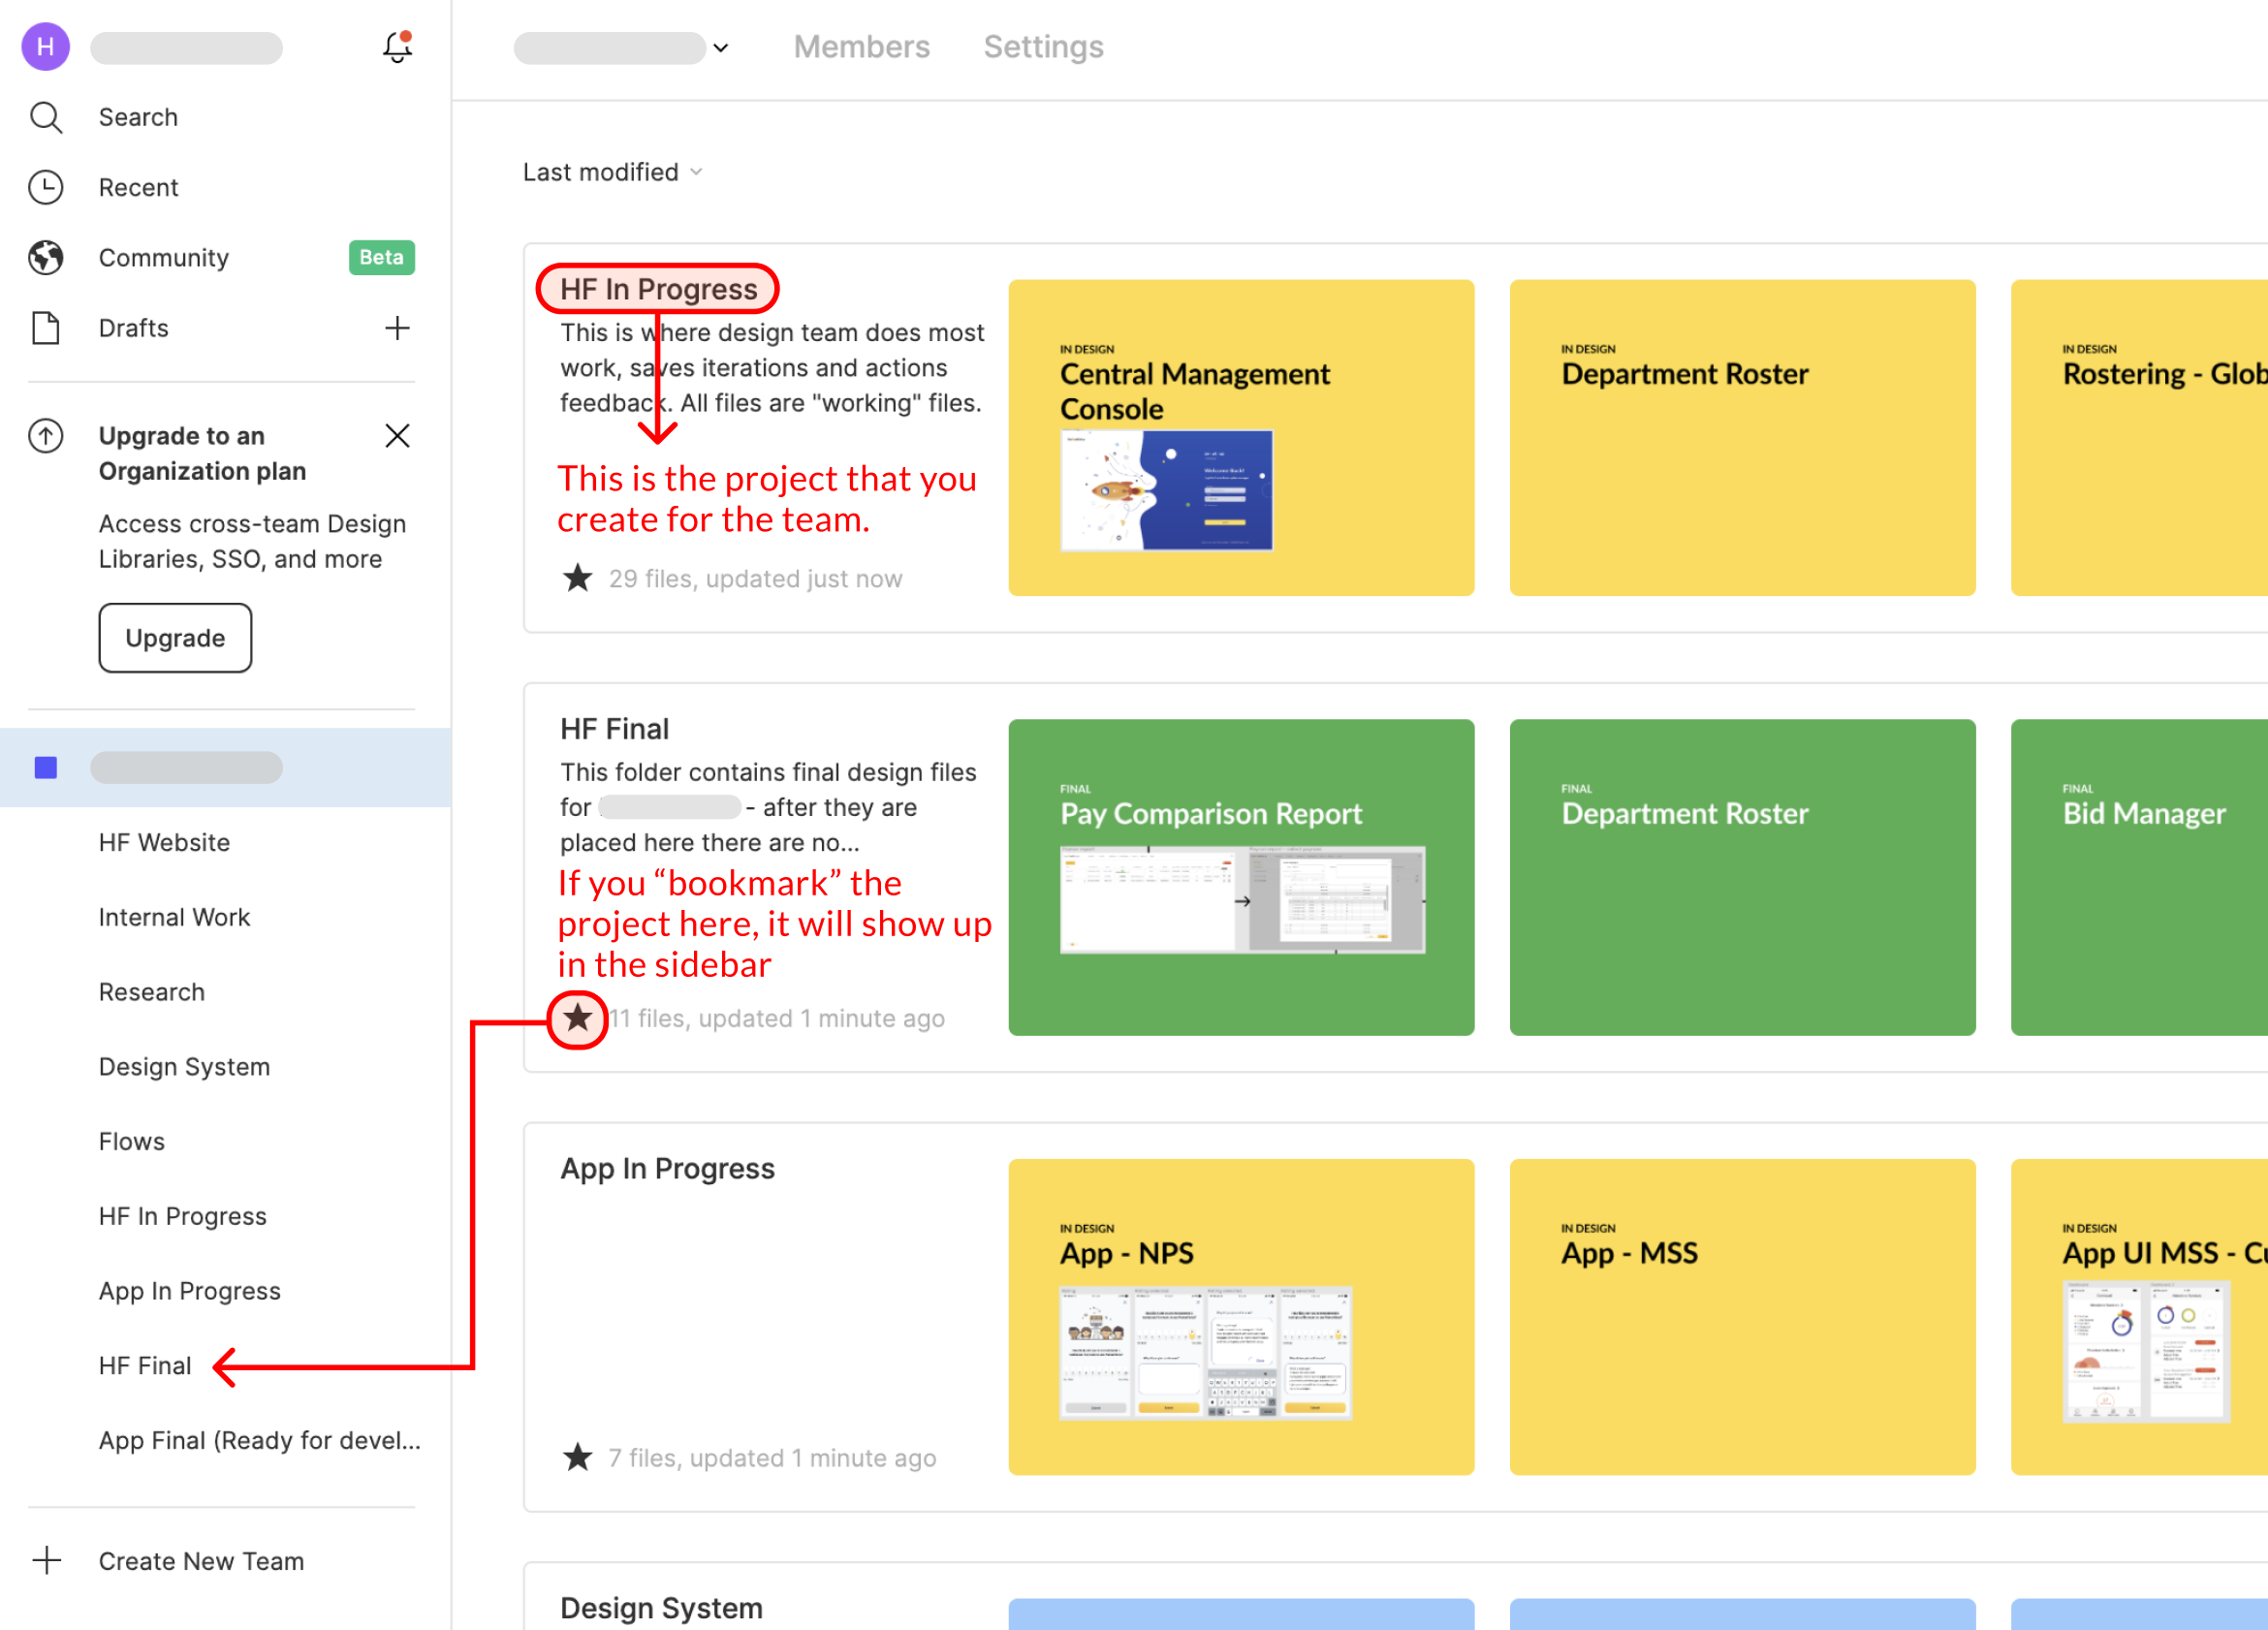
If you add a new project to the team, it probably won’t show up in your sidebar, so you’ll need to “favourite” it by clicking on the star. That will make it easier and faster to access when you are working on designs.
Covers
Covers are really useful, especially when you have many files to work with. They allow you to see what is inside without opening every single one.
Setting up covers is really useful – just make sure that the first page of every project isn’t used for anything else. The process is simple:
- Create a page called “cover”.
- On that page create a frame (dimensions don’t matter, but in the examples shown they are 700px x 400px).
- On that Frame, add the title of the file and maybe even a screenshot of the design to help you see the content at a top level even better.
- Set the background of the space to the same colour as the frame.
Of course, there are other ways of doing it. You can check out this plugin – it does the same thing but automates many of the steps above.
Sharing with teams
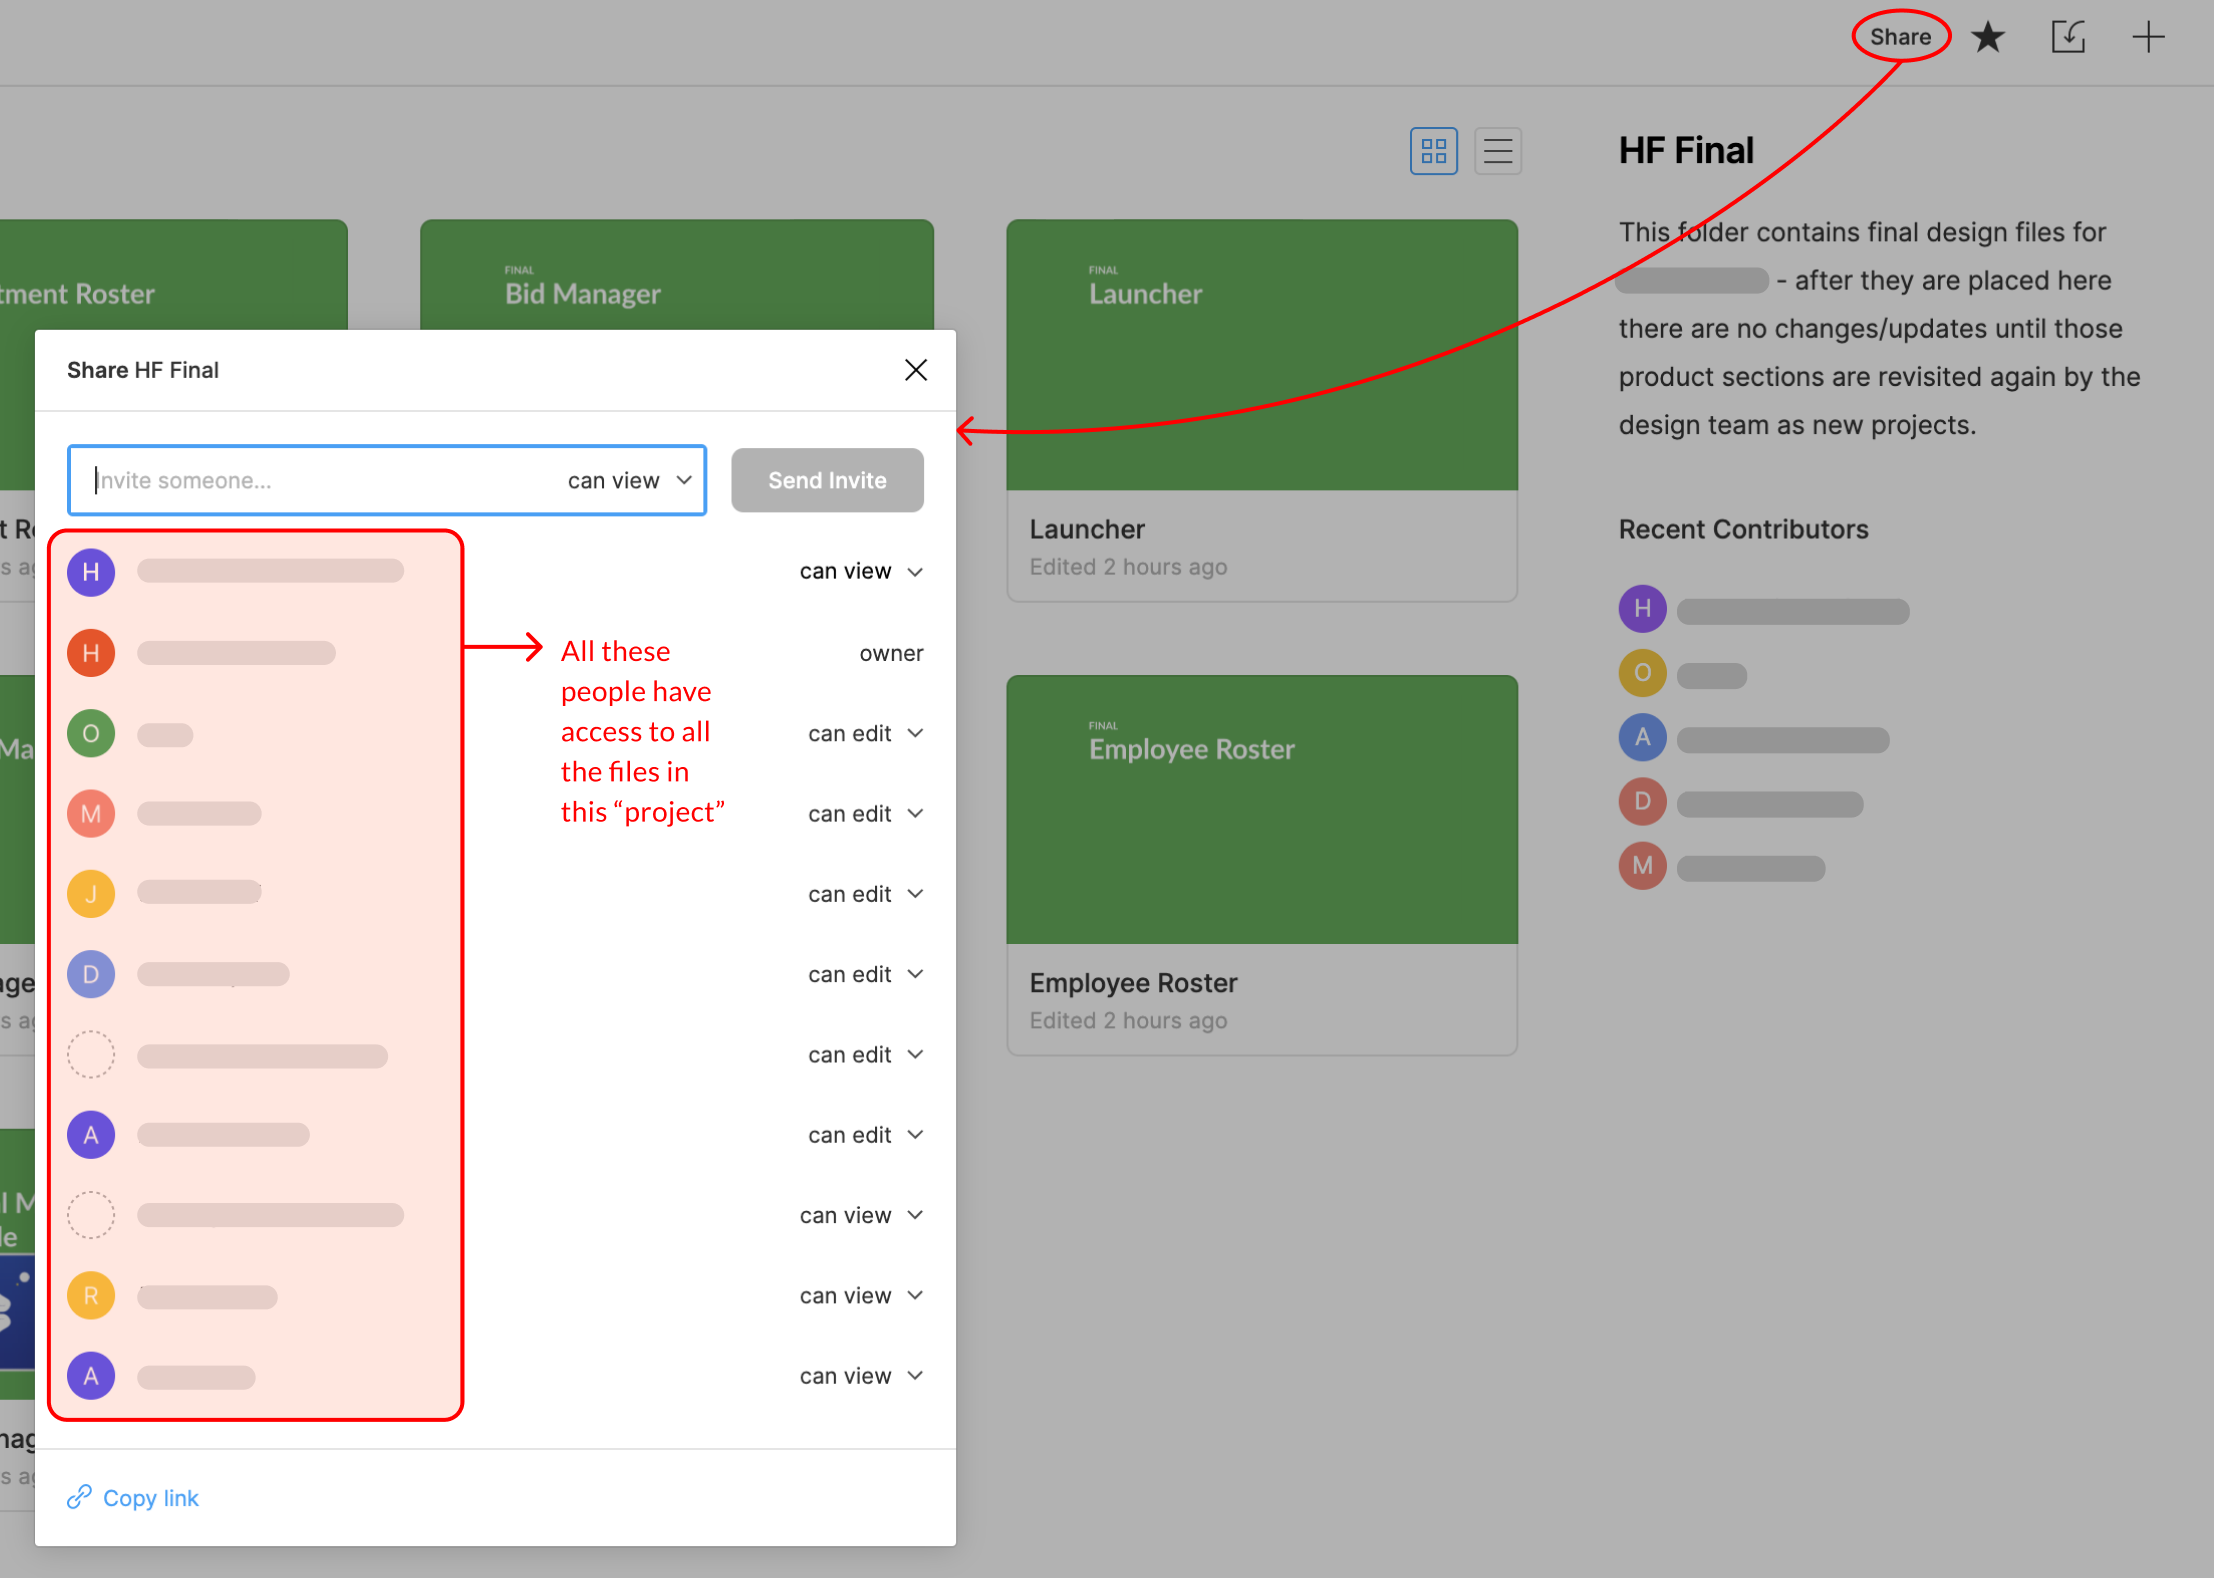
You can share an entire project with others, or even just a particular file. This makes it very convenient to collaborate with others in the organisation.
You can share and adjust editing rights by clicking on the “share” button, which is always in the top right corner of the screen.
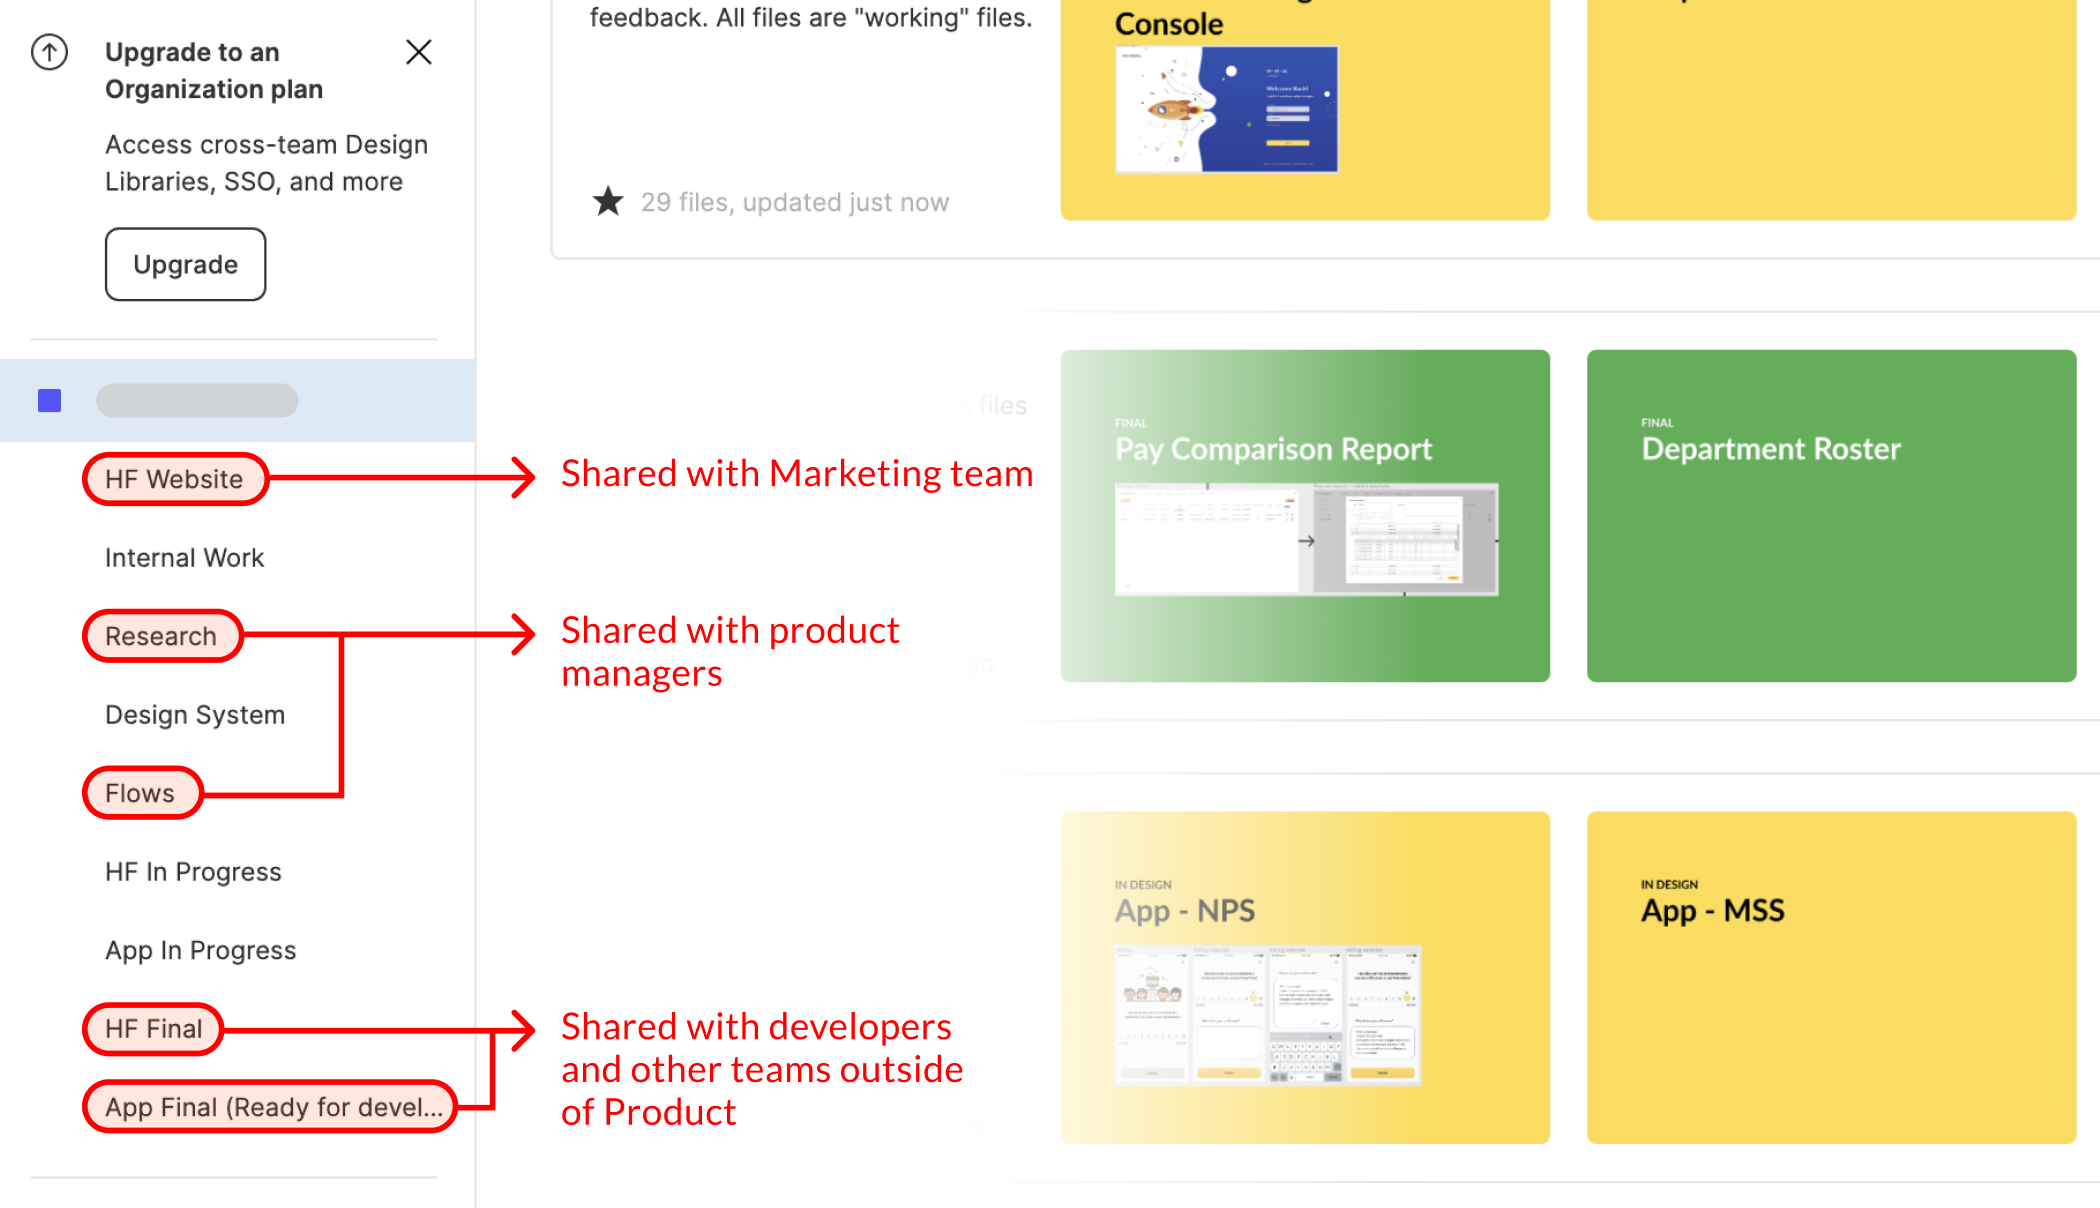
For example, in the image above, project “HF Website” is shared with Marketing team. Designers don’t really do much there, the project simply has cop of some of the product designs that are commonly used in marketing. That way Marketing team can update copy for their materials at any point, saving designers some time.
“Internal work” project refers to just that – things that will be internal. Such as data visualisation, roadmaps, etc. for internal presentations within the business. Only designers have access to this.
“Research” houses all types of research – notes from user interviews, testing, and contextual inquiries. Doing this in Figma is ver convenient as you can create flows and diagrams next to your notes, not to mention do affinity mapping. Only designers and product managers have access to this.
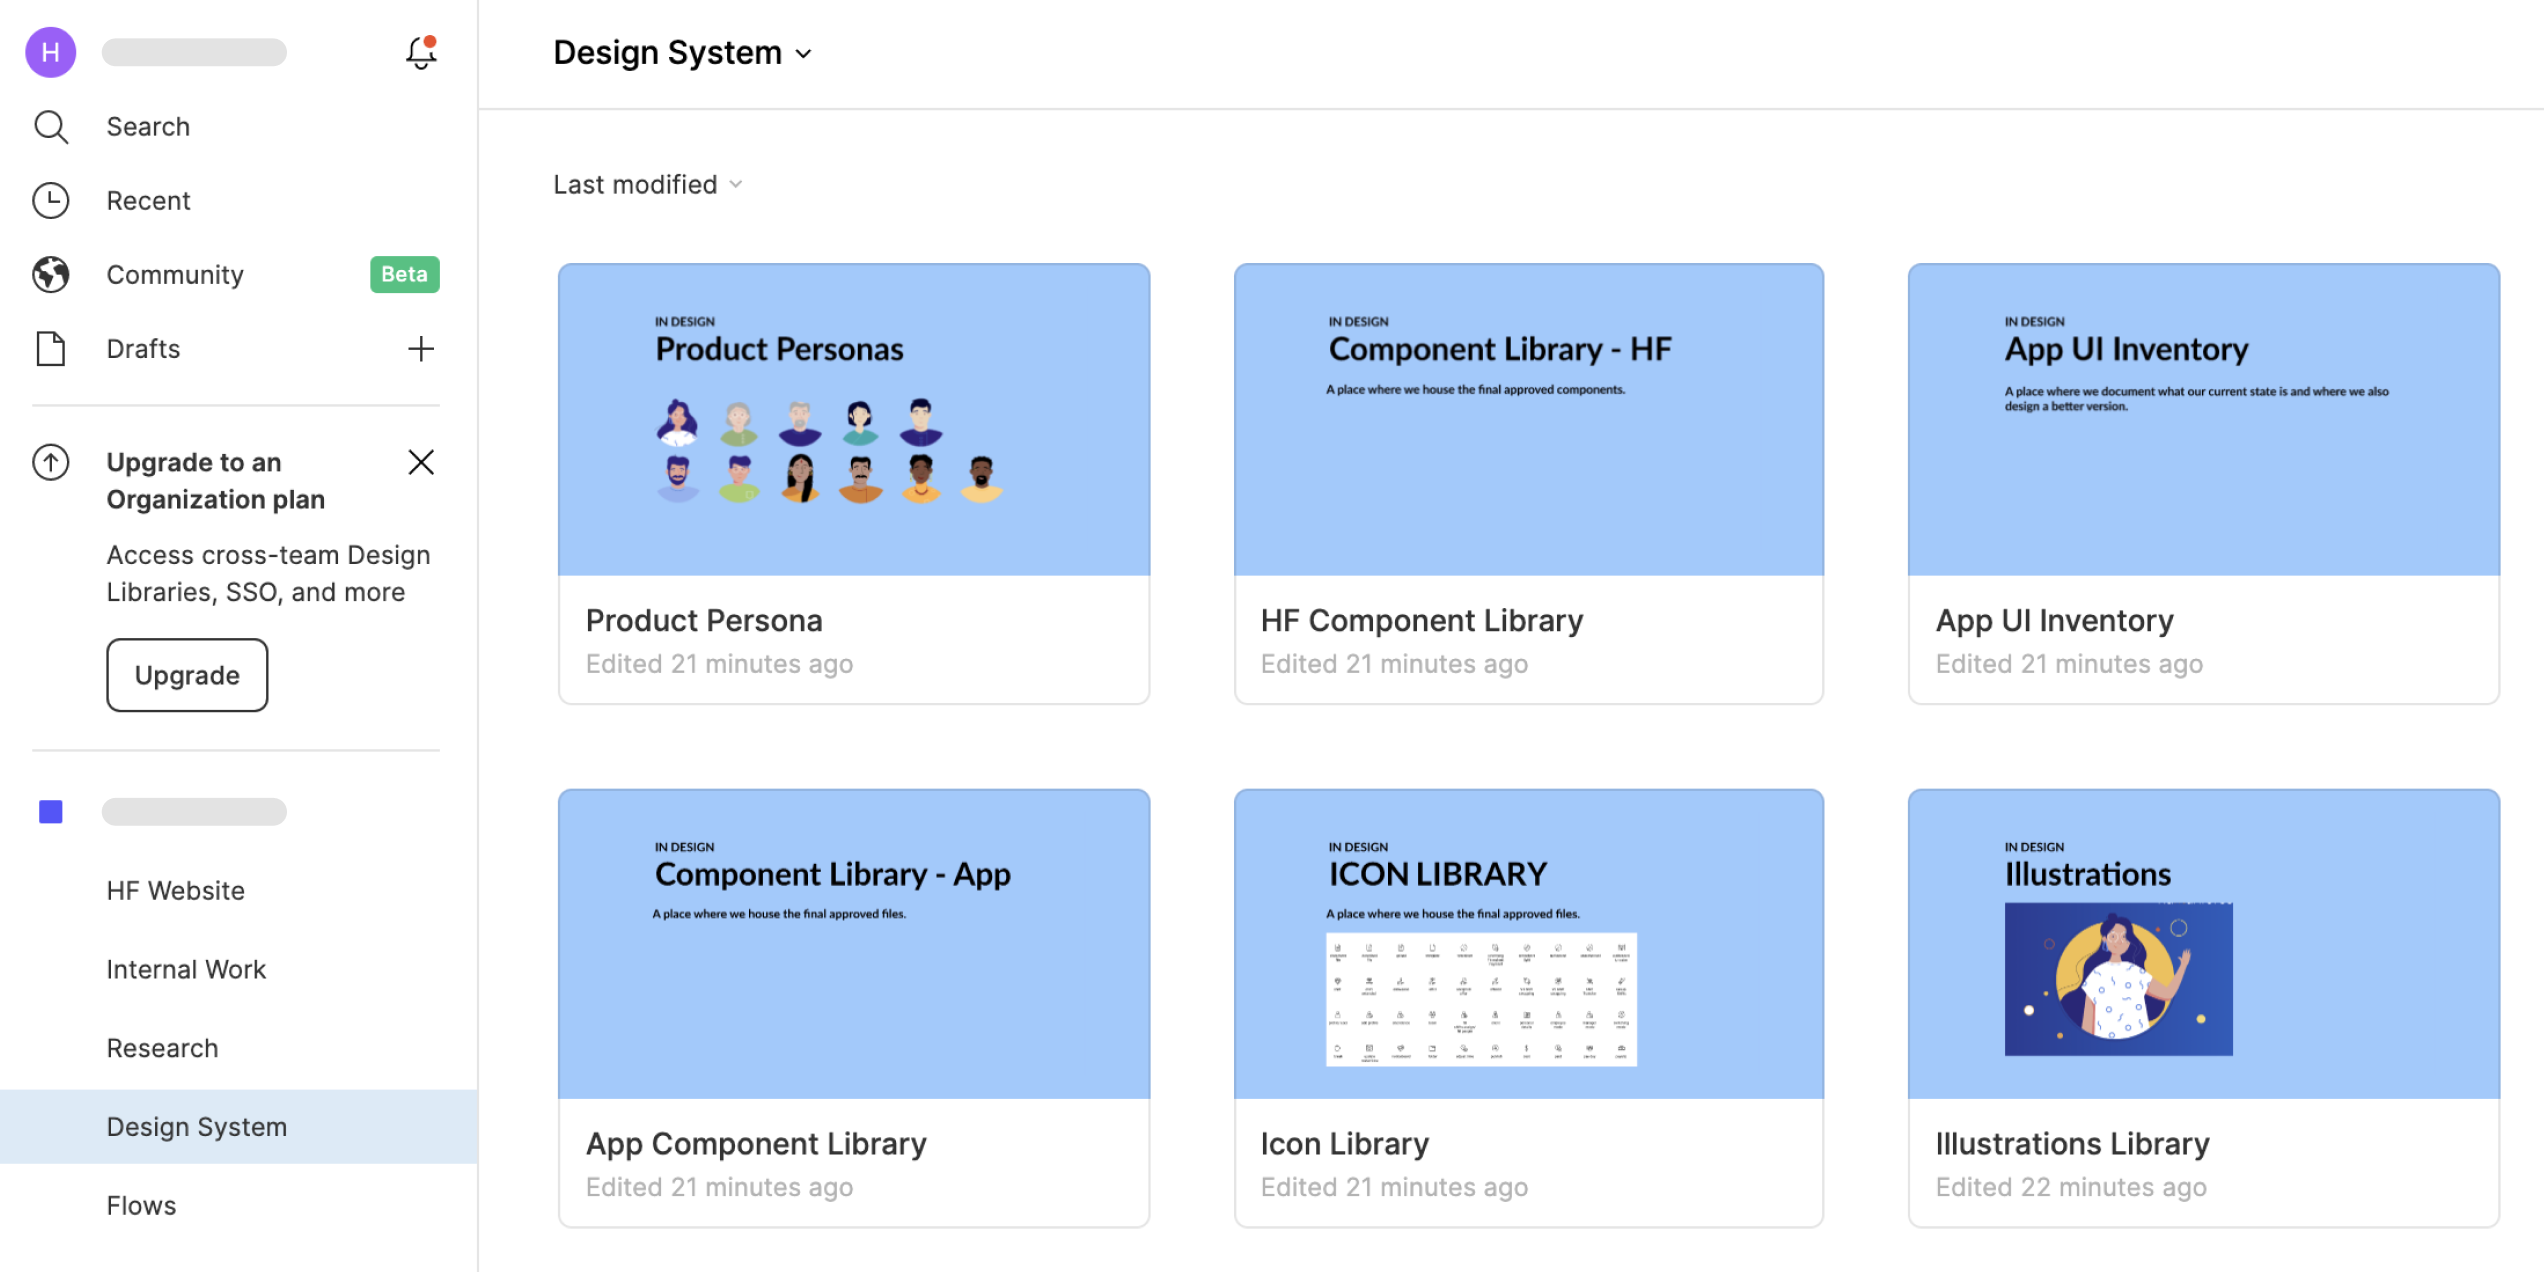
“Design system” has all the visual elements – component library, interface inventories, illustrations, icons, etc. Assets here are “published” to be used on all other projects. Only designers have access to it.
“Flows” is a mini-project where user flows and wireflows are documented. Designers and product managers have access to this.
“Hf in progress” and “App in progress” are the files only designers have access to. This is where design happens, and versions and iterations are tracked. Because it can at times get messy with all the different variations of the same thing, it’s safer if only designers can see the content here.
“HF Final” and “App Final” are the projects where final versions of design are housed. Designers, product managers, and developers have access to these files. People from other teams within the organisation have links to these projects, as they can see what is currently being developed or is planned for development (they can view, not edit). Unlike “In progress” projects, files here only have one version – the final one.
If you follow the above recommendations, you will be able to set up files and share information in Figma for the entire organisation, not just for yourself. Something that stakeholders and clients will thank you for.